When you’re getting ready to make clothes, there’s a document that’s super important: the tech pack. Think of it like a detailed instruction manual for whoever is going to make your garments. It covers everything from how the clothes should look to the exact measurements and materials. Without a good tech pack, things can get confusing really fast, leading to mistakes and wasted time. This guide will help you understand what a tech pack is and why it’s a must-have for anyone producing apparel.
Key Takeaways
- A tech pack is a detailed document that tells manufacturers exactly how to make a garment, acting like a blueprint for production.
- It includes things like flat drawings, material specs, color details, and precise measurements to avoid confusion.
- Using a tech pack helps ensure that the clothes made are accurate to your design and meet quality standards.
- This document is vital for clear communication between designers and factories, reducing errors and rework.
- A well-made tech pack saves time and money by preventing misunderstandings and mistakes during manufacturing.
Understanding the Core of a Tech Pack
Getting started with garment production? Then the tech pack is something you’ll hear about early and often. It’s not just paperwork; it’s the roadmap for making your product real, helping you avoid missed details and costly missteps.
What Is a Tech Pack?
A tech pack is a document that explains every requirement for a single apparel style. It contains all the details the factory needs: sketches, sizes, materials, colors, trims, and special notes—right down to the last snap, stitch, or wash instruction. Think of it as the instruction manual that keeps your design on track from concept to finished product.
- Lists all materials, trims, and suppliers
- Contains black and white or color design sketches
- Provides clear product measurements
- Notes construction methods and any unique finishing touches
A tech pack keeps you and the manufacturer aligned. When something gets missed or needs changing, it’s usually in the tech pack.
Don’t underestimate the tech pack—it often spells the difference between smooth sailing and months of frustrating back-and-forth.
The Purpose of a Tech Pack in Apparel Production
The main aim of a tech pack is consistency. It creates a single source of truth that everyone—be it designers, manufacturers, or quality teams—refers to during the process.
Here’s why it’s always worth the effort:
- Sets clear expectations up front
- Reduces mistakes from misunderstanding or guessing
- Acts as backup when disagreements pop up in production
- Helps track changes or updates across multiple rounds
If you’re ever wondering where the factory got a specific measurement from, look no further than your tech pack.
Tech Pack vs. Spec Sheet: Key Differences
People sometimes use these terms interchangeably, but they’re not identical. Both are important, yet they do different jobs in the product development workflow:
| Feature | Tech Pack | Spec Sheet |
|---|---|---|
| Purpose | Complete blueprint for production | Focus on measurements and specs |
| Content | Sketches, materials, construction | Flat drawing, measurements |
| Level of Detail | Everything (includes spec sheet) | Mostly numbers and dimensions |
| Updates | Changes throughout development | More static; rarely updated |
So, while your spec sheet sits inside the tech pack, the tech pack is the full story—not just the measurements, but the instructions, materials, and all the details you need for a production handoff.
Essential Components of a Comprehensive Tech Pack
Alright, so you’ve got this amazing design idea, right? But how do you actually get it made without it turning into a total mess? That’s where the tech pack really shines. Think of it as the instruction manual for your garment. It’s not just a sketch; it’s the nitty-gritty details that tell a factory exactly what you want.
First things first, you need a cover sheet. This is like the title page of your book. It should clearly state the product name, style number, season, and maybe even the designer’s name. It’s the first thing the factory sees, so make it clear and organized. This helps them keep track of everything, especially if you’re working on a whole collection. It’s the basic info that gets everything started on the right foot.
This is where your design really comes to life on paper, but in a super technical way. You’ll need detailed flat drawings, which are basically like X-rays of your garment. They show the front, back, and sometimes even side views, all laid out flat. These aren’t artistic renderings; they’re precise outlines showing seam lines, stitching details, and where pockets or other features go. You might also include close-up sketches of tricky bits, like how a collar should be attached or the exact placement of a logo. These drawings are the visual backbone of your tech pack. They help the factory understand the construction without any guesswork.
This section is all about what your garment is made of. You need to list every single fabric, button, zipper, thread, and label. For fabrics, include details like the type of material (e.g., cotton, polyester blend), its weight, color, and any special finishes. For trims, specify the exact type, size, color, and even where you want them placed. If you have a preferred supplier for any of these, list that too. This part is super important for getting the look and feel you want. Getting the right materials makes a huge difference in the final product.
If your design involves specific colors or graphics, this is where you lay it all out. You’ll need to provide exact color codes, usually from a system like Pantone. Attaching actual fabric swatches or color chips can also be really helpful. For any artwork, like prints or embroidery, you need to provide the digital files and clear instructions on size, placement, and the number of colors to be used. This section prevents those awkward moments where the color is just a little bit off.
This section is critical for maintaining brand consistency. If you have specific brand colors, they need to be communicated precisely to ensure that every garment produced aligns with your brand’s visual identity. Don’t just say ‘blue’; specify the exact Pantone shade.
Size Specifications and Measurement Charts
This is probably one of the most critical parts of the tech pack. You need a detailed size chart that lists all the measurements for each size you plan to offer. This isn’t just about the overall length; it includes specific points like chest width, sleeve length, waist circumference, and inseam. Think about every measurement that defines the fit of your garment. Providing these precise numbers helps the factory create accurate patterns and ensures that your sizing is consistent across different styles and production runs. It’s the blueprint for how the garment should fit.
| Measurement | Size S | Size M | Size L |
|---|---|---|---|
| Chest Width | 18″ | 20″ | 22″ |
| Body Length | 26″ | 27″ | 28″ |
| Sleeve Length | 24″ | 24.5″ | 25″ |
Grading and Sizing Across Different Dimensions
Once you have your base size measurements, you need to think about how those measurements change for other sizes. This is called grading. Your tech pack should include a graded spec chart that shows the difference in measurements between each size. For example, how much does the chest width increase from a Small to a Medium? This ensures that the proportions of the garment remain consistent as the size changes, so a Medium doesn’t suddenly look awkward compared to a Small. It’s all about keeping the fit balanced across the entire size range. This is a key part of apparel production.
Stitching and Construction Guidelines
This section tells the factory how the garment should be put together. You need to specify the types of stitches to be used (e.g., single needle, overlock), seam allowances (how much fabric is used for the seam), and any special construction techniques. For instance, how should the waistband be attached? What kind of hem should be used? Clear instructions here prevent the factory from making assumptions that could lead to a garment that doesn’t look or feel right. It covers everything from how the seams are sewn to the finishing details.
Ensuring Precision with Measurements and Construction
Okay, so you’ve got your design looking sharp on paper, maybe even a cool sketch. But how do you actually get it made so it fits right and looks like you imagined? That’s where the nitty-gritty details of measurements and how the thing is put together come in. This isn’t just about saying ‘medium size’; it’s about exact numbers and specific instructions.
Size Specifications and Measurement Charts
This is where we get down to the numbers. You need a clear measurement chart, often called a spec sheet, that tells the factory exactly what dimensions each part of the garment should be. Think of it like a blueprint for the fit. You’ll pick a base size, usually a medium or whatever your target customer wears, and list out all the key measurements for that size. This includes things like:
- Chest width
- Waist circumference
- Sleeve length
- Body length from shoulder to hem
- Inseam (for pants)
It’s super important that these measurements are clear and easy to understand. If the factory doesn’t know exactly how you want something measured, you’re going to get inconsistent results. For example, for ‘body length’, you need to specify if it’s from the highest point of the shoulder (HPS) or the center back neck. We’re talking about getting the fit just right, and that starts with precise numbers.
Remember, sewing involves human hands and machines, and things aren’t always perfectly exact. You’ll need to include ‘tolerances,’ which are the acceptable small variations in measurements. This prevents tiny differences from causing big problems down the line. For instance, a tolerance of +/- 0.5 cm might be acceptable for certain measurements.
Grading and Sizing Across Different Dimensions
Once you’ve nailed down the measurements for your base size, you need to figure out how those measurements change for other sizes – small, large, extra-large, and so on. This process is called grading. Your pattern maker will use ‘grade rules’ to adjust each measurement proportionally for every size. This ensures that a size Large fits differently from a size Medium in a predictable way, maintaining the garment’s intended silhouette and proportions. A good tech pack will include a graded spec chart showing these adjustments for each size. This is how you make sure your design scales properly and doesn’t end up looking weird in larger or smaller sizes. It’s all about consistency across the entire size range.
Stitching and Construction Guidelines
Beyond just the size, how the garment is put together matters a lot. This section of your tech pack details the construction methods. You need to specify:
- Seam Types: Are you using a French seam, a flat-felled seam, or a simple overlock stitch? Different seams have different looks and strengths.
- Stitching Details: What kind of stitch count per inch (SPI) is required? Are there specific topstitching details or decorative stitching needed?
- Construction Order: Sometimes, the order in which pieces are sewn together is important for the final look and fit. You might need to note if a pocket should be attached before the side seams are sewn, for example.
- Hemming and Cuffs: How should the hems be finished? Rolled hem, double-needle hem, or something else? How are cuffs constructed?
Clear instructions here prevent the factory from making assumptions. If you want a specific look or a certain level of durability, you have to spell it out. This part is all about making sure the garment is built correctly, matching the design intent and quality standards you’re aiming for. It’s the difference between a garment that just hangs there and one that drapes and wears well.
The Role of a Tech Pack in Quality and Efficiency
Think of your tech pack as the ultimate instruction manual for your garment. It’s not just a nice-to-have; it’s the backbone of making sure your product turns out right, every single time. Without one, you’re basically sending your factory on a treasure hunt with a blurry map. This document is where all the nitty-gritty details live, from the exact thread count of the fabric to the precise placement of a pocket. This level of detail is what separates a great product from a disappointing one.
Maintaining Manufacturing Accuracy
When you hand over a well-made tech pack, you’re giving your manufacturer a clear roadmap. Every measurement, stitch type, and construction method is laid out. This means they know exactly what you expect, reducing the chances of them guessing or making assumptions. It’s like giving a chef a detailed recipe versus just telling them you want ‘a nice pasta dish.’ The tech pack ensures they can replicate your design accurately, even if they’ve never seen it before.
- Clear Measurements: Precise numbers for every part of the garment.
- Construction Details: Specifics on how seams, hems, and other elements should be put together.
- Material Call-outs: Exact fabric and trim information.
A tech pack acts as a universal language. It bridges gaps between designers, factories, and suppliers, making sure everyone is on the same page. This shared understanding is key to getting the product made correctly the first time.
Reducing Errors and Rework
Mistakes in manufacturing can be incredibly costly, both in terms of money and time. A good tech pack acts as your first line of defense against these issues. By clearly defining everything upfront, you minimize the need for back-and-forth communication about what went wrong. This means fewer samples that are off, less fabric wasted, and less time spent fixing problems. It streamlines the whole process, getting your product to market faster.
Here’s how it helps cut down on errors:
- Prevents Misinterpretation: Reduces the risk of misunderstandings about design elements.
- Minimizes Fit Issues: Accurate measurements and grading charts lead to consistent sizing.
- Standardizes Components: Ensures all trims, labels, and finishes are applied as intended.
Ensuring Consistent Product Quality
Consistency is king in the fashion world. Customers expect a certain level of quality and fit every time they buy from your brand. Your tech pack is the tool that helps you achieve this. It serves as the benchmark against which every production run is measured. Whether you’re working with the same factory or a new one, the tech pack provides the standard. This means your bestsellers can be reproduced reliably, and new styles maintain the quality your customers have come to expect. It protects your brand’s reputation and builds customer loyalty.
Creating and Managing Your Tech Pack Effectively
So, you’ve got this amazing design idea, right? But getting it from your head into a real, tangible garment is where the tech pack really shines. Think of it as your product’s instruction manual. Getting this document right from the start saves a ton of headaches later on. It’s not just about pretty drawings; it’s about clear communication with your factory.
Step-by-Step Guide to Tech Pack Creation
Putting together a tech pack might seem a bit daunting, but breaking it down makes it manageable. Here’s a way to approach it:
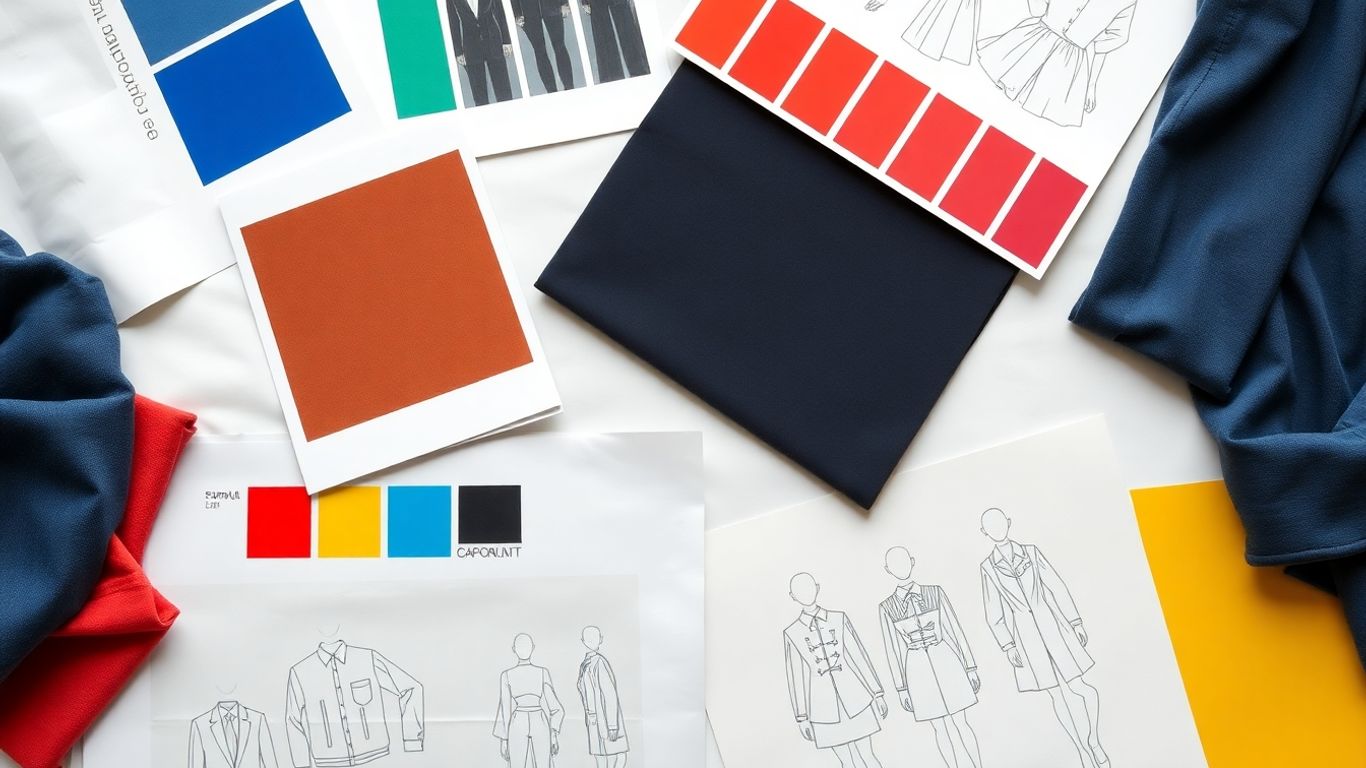
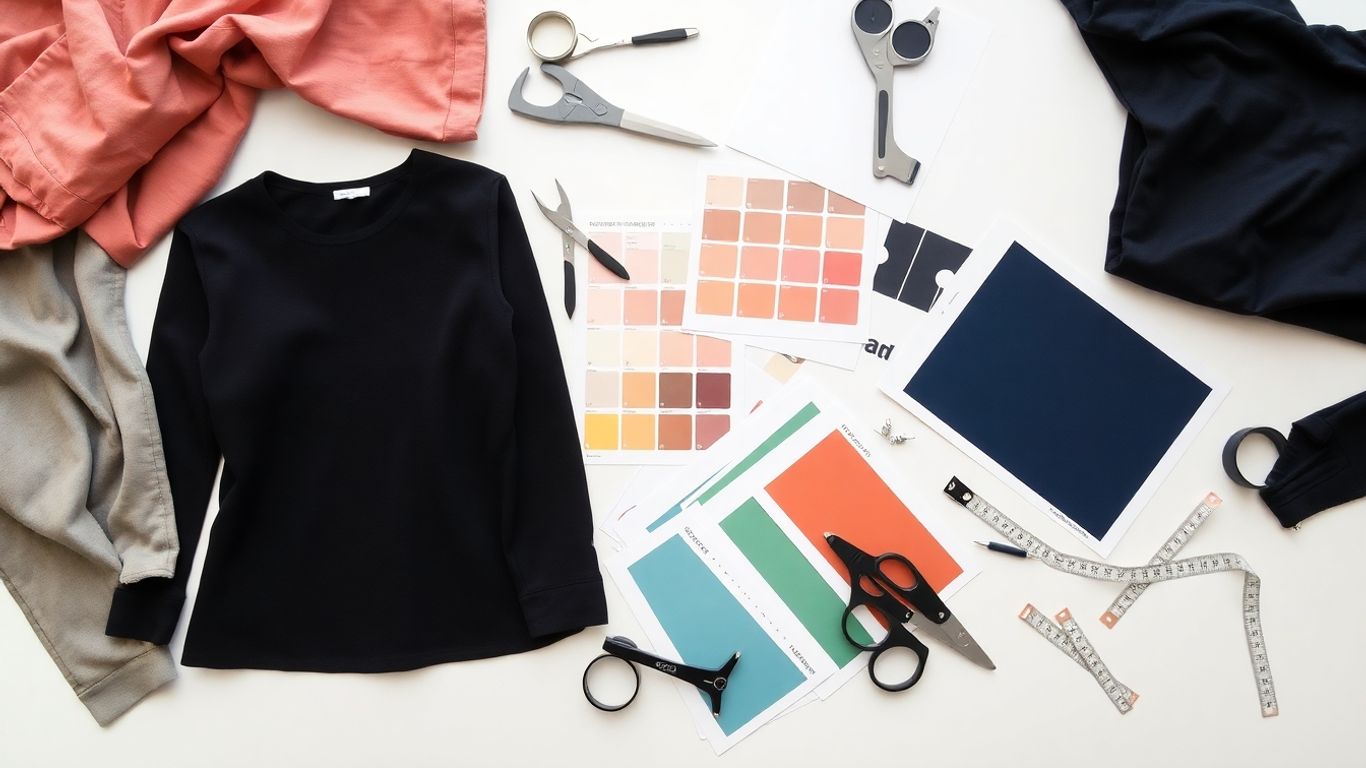
- Start with Your Vision: Gather all your inspiration. This includes mood boards, color palettes, fabric ideas, and any specific design elements you’re aiming for. It helps to have a clear picture before you start sketching.
- Sketch It Out: Use digital tools like Adobe Illustrator for your technical sketches. This makes it way easier to tweak details and get those front and back views just right. Don’t forget close-ups for tricky bits.
- Detail Your Materials: List every fabric, button, zipper, and thread. Include details like composition, weight, and where you sourced it, if you have a preferred supplier. Having samples handy is a good idea.
- Size It Up: Create a detailed size chart. This needs to include all the key measurements for each size you plan to offer. Make sure it aligns with the sizing standards for your target market.
- Explain the Build: Write down clear instructions for construction and stitching. What kind of seams? How should the hems be finished? The more specific you are, the better.
- Assemble the Pack: Combine all this information into one organized document. A logical flow is key so your manufacturer can easily find what they need. You can find helpful tech pack templates online to get you started.
Tips for Efficient Tech Pack Layout and Formatting
How you present the information matters. A messy tech pack can lead to confusion, even if the details are all there. Keep things clean and easy to follow.
- Visual Clarity: Use a consistent layout. Make sure your drawings are clear and your text is readable. White space is your friend here.
- Standard Language: Stick to industry-standard terms. This cuts down on misunderstandings. If you’re unsure about a term, look it up or ask someone experienced.
- Be Explicit: Don’t assume your factory knows what you want. Clearly state your expectations for quality, finishes, and any special details.
A well-organized tech pack acts as your product’s single source of truth. It ensures everyone involved, from pattern makers to quality control, is working from the same set of instructions. This consistency is vital for maintaining brand integrity and scaling your production.
Leveraging Software Tools for Tech Pack Development
While you can create tech packs in programs like Excel or Illustrator, they weren’t specifically built for fashion. Specialized software can make the process smoother. These tools often have built-in templates, version control, and collaboration features that can really speed things up. They help manage the complexity that comes with evolving designs and multiple revisions.
Updating Your Tech Pack Throughout Production
Your tech pack isn’t a static document. Things change during development – maybe a fabric isn’t available, or a sample fit needs a slight adjustment. It’s super important to update your tech pack with every single change. Then, make sure you send the revised version to your factory immediately. Keeping everyone on the same page prevents costly mistakes and delays down the line. This ongoing communication is what turns a design into a successful product.
Beyond the Garment: Labeling and Packaging
So, you’ve got the garment design down, the materials are sorted, and the construction details are crystal clear. But wait, there’s more! The final touches, the bits that make your product look professional and ready for the customer, are all about labeling and packaging. It’s not just about slapping a tag on it; it’s about brand identity and how the product is presented.
Labeling and Branding Requirements
This is where your brand’s personality really shines through. Think about the main label, the one sewn into the garment’s neckline or side seam. What does it say? What material is it made from? Is it a woven label, a printed tag, or something else entirely? Then there are the care labels, which are super important for letting customers know how to wash and care for their new clothes. Don’t forget hang tags, either. These are often the first thing a shopper sees, so they need to look good and carry the right information, like the style name, size, and maybe a little brand story.
- Main Label: Usually includes brand name, country of origin, and fiber content.
- Care Label: Details washing instructions, symbols, and fiber content.
- Hang Tags: Display style information, size, price (optional), and brand logo.
- Other Labels: May include size labels, special feature labels (e.g., “organic cotton”), or promotional tags.
Packaging Specifications for Presentation
How your product is packed can make a big difference in how it’s perceived. Are you shipping items folded in a polybag, or do they need to be hung? Some brands require specific box sizes or even special barcode labels for their distribution centers. It’s all about making sure the garment arrives in perfect condition and is easy for the next step in the supply chain to handle. Think about the customer’s unboxing experience, too. A little extra care in packaging can go a long way.
The details here might seem small, but they really matter. Getting the packaging right means the product looks good from the moment it leaves the factory all the way to the customer’s hands. It’s about protecting the garment and making it look appealing.
Here’s a quick rundown of what to consider for packaging:
- Folding Method: How the garment should be folded within the bag.
- Bag Type: Standard polybag, compostable bag, or other.
- Hanger Requirements: If shipping on hangers, specify the type and how they should be packed.
- Box Dimensions: If shipping in boxes, provide exact measurements.
- Labeling: Any specific barcode or shipping labels needed for the boxes.
Wrapping Up: Your Tech Pack is Key
So, we’ve gone through what a tech pack is and why it’s super important for making clothes. Think of it as your project’s instruction manual. It helps make sure everyone, from the person drawing it up to the factory making it, is on the same page. Using a good tech pack means fewer mistakes, better quality clothes, and less hassle overall. It’s really the best way to get your designs made just the way you pictured them.
Frequently Asked Questions
What exactly is a tech pack?
Think of a tech pack like a super-detailed instruction manual for making a piece of clothing. It’s a collection of documents that tells a clothing factory everything they need to know to create your design perfectly. This includes drawings, measurements, fabric details, and more.
Why is a tech pack so important for making clothes?
A tech pack is super important because it makes sure everyone involved in making the clothes is on the same page. It prevents mistakes and confusion, which saves time and money. It’s like a blueprint that guarantees the final product looks and feels exactly how you imagined it.
What’s the difference between a tech pack and a spec sheet?
A spec sheet gives basic details about a garment, like measurements. A tech pack is much more detailed. It includes everything from the spec sheet plus drawings, fabric types, stitching instructions, and even how to package the final item. It covers the whole production process.
What are the most important parts of a tech pack?
Key parts include detailed drawings of the garment (front, back, sides), precise measurements for every size, information about the fabrics and any buttons or zippers (called trims), and instructions on how to sew it all together. Color details are also crucial.
How does a tech pack help ensure good quality?
By providing very specific instructions and measurements, a tech pack acts as a standard. Manufacturers use it to make sure every single piece of clothing is made the same way, with the right materials and dimensions. This consistency is key to high quality.
Can I use a tech pack even if I’m just starting out?
Absolutely! Even if you’re new to making clothes, a tech pack is a fantastic tool. It helps you organize your ideas and communicate them clearly to a factory. It’s a smart way to avoid costly errors and get your designs made right from the start.